
The world of bubble tea is a delightful realm of chewy textures and sweet, refreshing flavors.
Tapioca pearls, with their unique chewiness, are the heart of this beloved beverage.
I first encountered handmade tapioca pearls on a trip to Taiwan, where each sip of bubble tea was a burst of joy.
Creating these pearls at home allows you to tailor their texture and flavor to your personal preference.
Whether you’re a bubble tea aficionado or a curious newcomer, mastering tapioca pearls will elevate your drink-making skills.
Join me as we explore the art of crafting these irresistible pearls from scratch.
The History and Cultural Significance
• Tapioca Pearls trace their origins to Taiwan in the 1980s, where they were originally created by tea shop owners seeking to innovate with textures.
• The dish evolved over decades as the popularity of bubble tea spread globally, leading to variations in flavors and sizes of the pearls.
• In Taiwanese culture, this dish traditionally appears at informal gatherings, symbolizing friendship and joy.
• While many variations exist across different regions, the authentic version maintains a chewy, translucent texture that sets it apart from imitations.
Recipe Overview
Nutritional Information (per serving)
Essential Equipment Guide
Large Mixing Bowl: A large mixing bowl is crucial for combining ingredients evenly, allowing you to knead the dough effectively without making a mess. A stainless steel or glass bowl is ideal for easy cleaning.
Slotted Spoon: This tool is essential for removing cooked tapioca pearls from boiling water without carrying excess liquid. If a slotted spoon is unavailable, a fine mesh strainer can be used as an alternative.
Non-Stick Saucepan: A non-stick saucepan ensures that the tapioca pearls do not stick to the bottom during cooking. Look for a saucepan with a heavy base for even heat distribution.
Ingredients
For the Tapioca Pearls
|
|
| Amount | Ingredient | Notes |
|---|---|---|
| 1 cup | tapioca starch | provides structure and chewiness |
| 1/2 cup | boiling water | helps bind the starch into a dough |
| 1 tablespoon | brown sugar | adds subtle sweetness and color |
Preparation Methods
Forming the Dough: The dough must be kneaded until smooth and elastic. This step is crucial for the perfect texture, as it determines the chewiness of the pearls. Kneading for about 5-10 minutes ensures all ingredients are fully integrated.
Rolling and Cutting: Roll the dough into thin logs and cut them into uniform pieces. This technique ensures that each pearl cooks evenly, providing a consistent texture.
Cooking in Boiling Water: Cooking the pearls in boiling water helps them achieve the desired translucent appearance. Stirring occasionally prevents them from sticking together and ensures uniform cooking.
Step 1: Prepare Ingredients

Gather all your ingredients and equipment.
Ensure the tapioca starch is fresh and lump-free.
Measure out 1 cup of tapioca starch, 1/2 cup of boiling water, and 1 tablespoon of brown sugar.
Set up your workspace with the mixing bowl, spoon, and saucepan nearby.
Step 2: Make the Dough

Combine tapioca starch and brown sugar in a large mixing bowl.
Slowly pour in the boiling water while stirring continuously with a spoon.
Mix until a rough dough forms, then switch to kneading by hand.
Knead the dough until it becomes smooth and elastic, about 5-10 minutes.
Step 3: Roll the Dough

Divide the dough into smaller portions for easier handling.
Roll each portion into long, thin logs about the thickness of a pencil.
Ensure the logs are even in thickness for uniform cooking.
Use a sharp knife to cut the logs into small, pearl-sized pieces.
Step 4: Shape the Pearls

Take each piece of cut dough and roll it between your palms.
Form smooth, round pearls, applying gentle pressure to eliminate cracks.
Continue rolling until all pieces are shaped into pearls.
Dust the pearls with a little tapioca starch to prevent sticking.
Step 5: Boil the Water
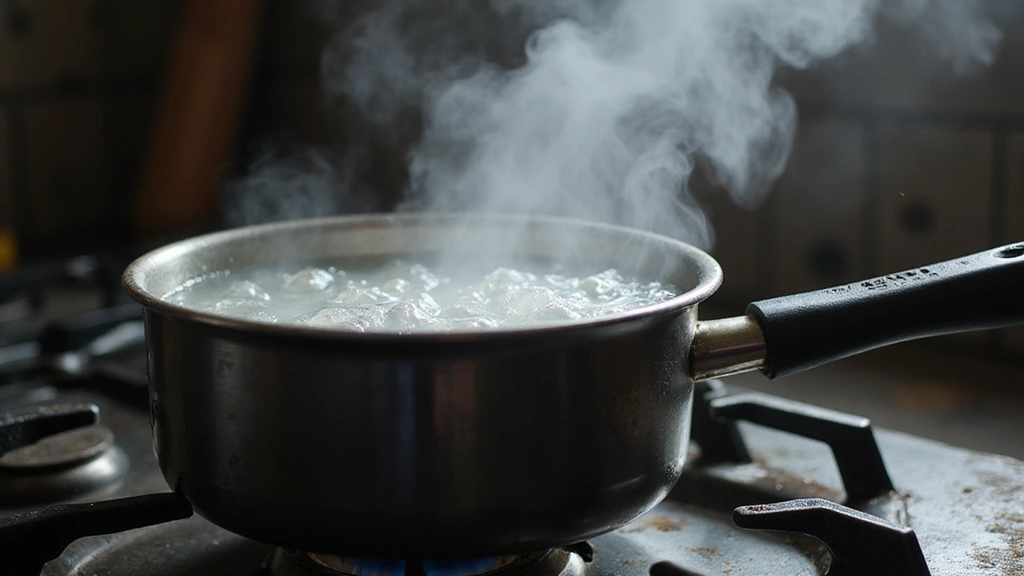
Fill a large saucepan with water and bring it to a rolling boil.
Ensure the water is boiling vigorously before adding the pearls.
This step is crucial to prevent the pearls from sticking together.
Prepare the slotted spoon for later use.
Step 6: Cook the Pearls

Carefully add the tapioca pearls to the boiling water.
Stir gently to prevent them from sticking to the bottom.
Cook the pearls for 15-20 minutes, or until they become translucent.
Check for doneness by tasting a pearl; it should be chewy but not hard.
Step 7: Cool the Pearls
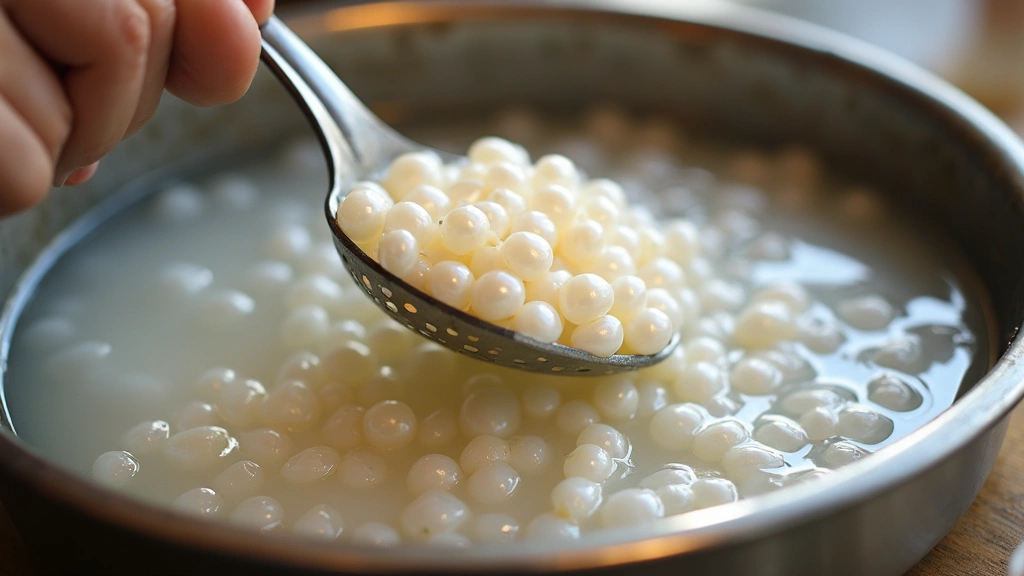
Once cooked, use a slotted spoon to transfer the pearls to a bowl of cold water.
This step stops the cooking process and firms up the texture.
Let the pearls sit in the cold water for about 5 minutes.
Drain the pearls and set them aside for serving.
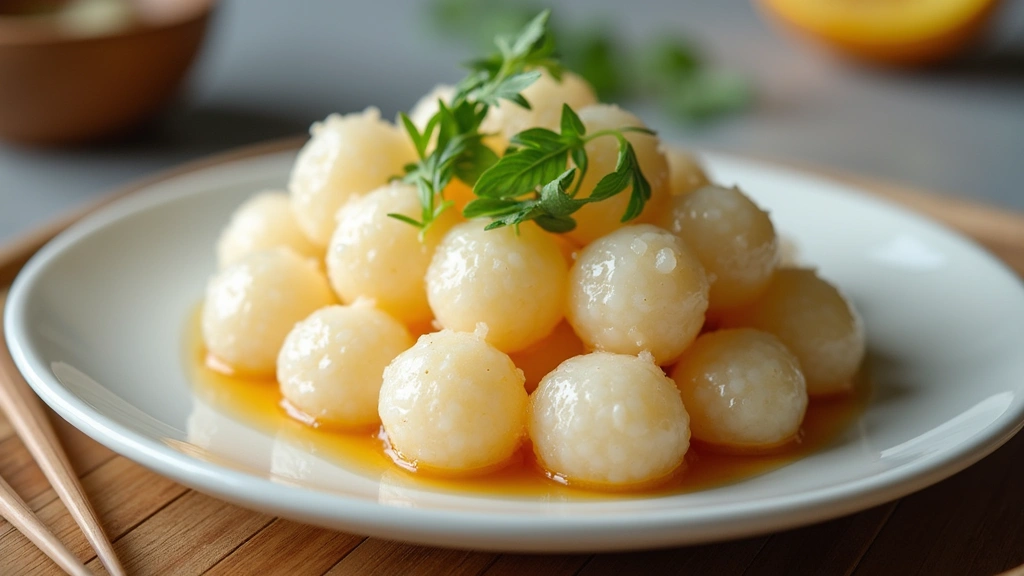
Step 8: Sweeten the Pearls
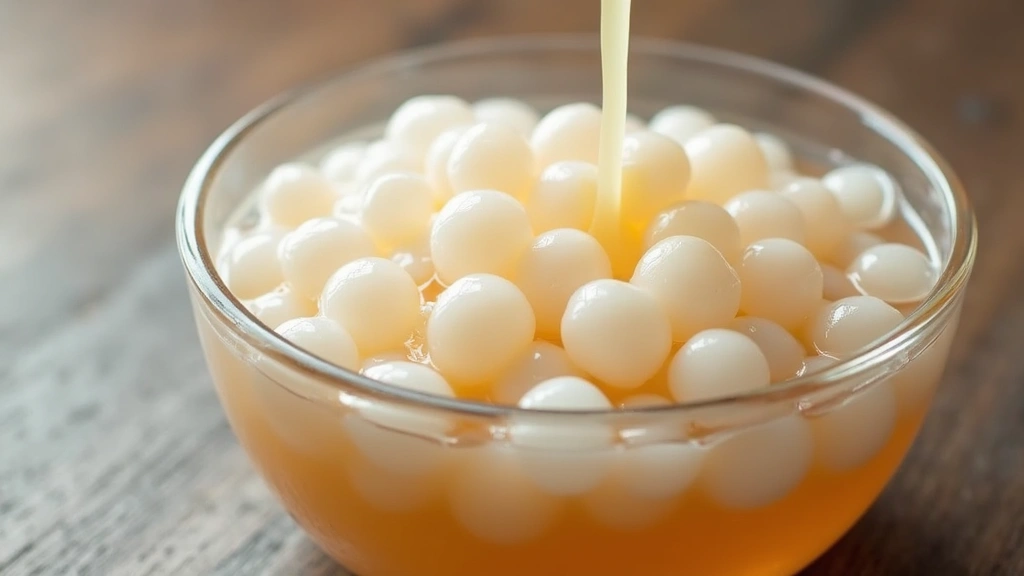
If desired, coat the cooked pearls with a simple syrup or brown sugar syrup.
This step adds additional sweetness and shine to the pearls.
Mix gently to ensure each pearl is coated evenly.
Let them rest for a few minutes to absorb the syrup.
Critical Timing and Temperature Guide
Boiling Water for Cooking: Maintain a rolling boil; pearls should cook for 15-20 minutes. Watch for translucent appearance as an indicator of doneness. Avoid undercooking, which results in a hard center.
Cold Water Soak: Soak pearls in cold water for 5 minutes to stop cooking. Ensure pearls are firm and chewy after soaking. Over-soaking can make the texture too soft.
Syrup Coating: Let pearls sit in syrup for 5 minutes to absorb flavor. Ensure even coating for consistent sweetness. Too much syrup can overpower the subtle flavor of the pearls.
Pro Tips for Tapioca Pearls
• Ingredient Selection: Choose high-quality tapioca starch for the best texture, as it directly impacts the chewiness of the pearls.
• Preparation Secret: Add the boiling water gradually to prevent clumping; this ensures a smooth, workable dough.
• Temperature Management: Keep the water at a rolling boil for even cooking; fluctuating temperatures can cause uneven texture.
• Texture Enhancement: Knead the dough thoroughly to develop elasticity, which is crucial for the signature chewy texture.
• Flavor Layering: Use brown sugar in the dough and syrup to add a rich, caramel-like undertone to the pearls.
• Make-Ahead Strategies: Shape and freeze the pearls for up to a week; cook directly from frozen for convenience.
• Restaurant-Quality Finishing Touches: Serve pearls in a chilled glass of bubble tea for an appealing temperature contrast.
• Equipment Optimization: Use a non-stick saucepan to prevent pearls from sticking during cooking, ensuring an even finish.
Troubleshooting Common Issues
• Texture Too Hard: Caused by undercooking or insufficient kneading; recognize by biting into a pearl and feeling resistance. Cook longer or knead dough more thoroughly.
• Pearls Sticking Together: Result of insufficient stirring or overcrowding in the pot. Stir gently and ensure enough water space for pearls to move.
• Uneven Cooking: Occurs when water temperature fluctuates. Maintain a consistent rolling boil and stir occasionally.
• Flavor Lacking: Caused by inadequate sweetening. Ensure syrup is well absorbed by letting pearls sit longer.
• Pearls Falling Apart: Happens if dough is too wet or not kneaded enough. Adjust water addition and knead to improve structure.
Variations and Regional Differences
• Japanese Mochi-Style: Uses a mix of tapioca and glutinous rice flour for a softer texture, often served with matcha-infused bubble tea.
• Thai Coconut Pearls: Incorporates coconut milk into the dough, adding a rich, tropical flavor profile.
• Vietnamese Coffee Pearls: Infuses the pearls with coffee flavor, pairing them with sweetened condensed milk for a robust taste.
• Korean Sweet Potato Pearls: Integrates sweet potato puree into the dough, providing a subtle sweetness and earthy undertone.
Food Science Behind the Recipe
• Gelatinization of Starch: Understanding how tapioca starch gelatinizes with boiling water helps achieve the ideal dough consistency, affecting the final texture of the pearls.
• Maillard Reaction: The use of brown sugar in the dough and coating promotes flavor development through the Maillard reaction during cooking.
• Heat Transfer: The principle of heat transfer ensures even cooking of the pearls; maintaining a rolling boil distributes heat uniformly, crucial for the desired chewiness.
Frequently Asked Questions
What's the most common mistake people make when preparing tapioca pearls? The most common mistake is undercooking the pearls, which leads to a hard, unpleasant texture. Ensure they are cooked until fully translucent.
Can tapioca pearls be made ahead of time? Yes, you can shape and freeze them for up to a week. Cook straight from the freezer for convenience.
How do I prevent pearls from clumping during cooking? Stir gently after adding them to boiling water and maintain enough water space for movement.
Why are my pearls falling apart? This is often due to a wet or poorly kneaded dough. Adjust water levels and knead thoroughly.
Can I use regular sugar instead of brown sugar? Yes, but brown sugar adds a richer flavor and color to the pearls.
What's the ideal water-to-pearl ratio during cooking? Use at least 10 parts water to 1 part pearls to ensure they cook evenly without sticking.
How do I achieve the perfect chewy texture? Knead the dough well and cook the pearls long enough for the starch to fully gelatinize.
Serving and Presentation Guide
• Traditional Presentation: Serve in a tall glass with a wide straw, allowing the pearls to be easily enjoyed with the drink.
• Layered Tea Presentation: Layer pearls at the bottom, followed by milk tea and a topping of whipped cream for a visually appealing treat.
• Fruit Tea Fusion: Combine pearls with fruit-infused teas like lychee or mango for a refreshing twist.
• Cold Brew Coffee Pairing: Add pearls to cold brew coffee for a unique take on this classic beverage.
Conclusion
Crafting tapioca pearls at home is a rewarding experience that adds a personal touch to your bubble tea.
With practice, you'll perfect the art of creating pearls with the ideal chewiness and flavor.
I encourage you to experiment with variations and share your creations with friends and family.
Enjoy the delightful textures and flavors of homemade tapioca pearls in every sip!